
Save and edit a Bullet
Saving a Bullet is a very easy process, and it lets you control every aspect of your library.
- Select what you want on the timeline.
- Click + Save at the top of the library.
- Choose the tab: Content or Preset. Each one has its own fields and options, which are explained below.
- Save your Bullet, and done: now you have a Bullet to fire back on your timeline wherever you need it.
Save your Bullets
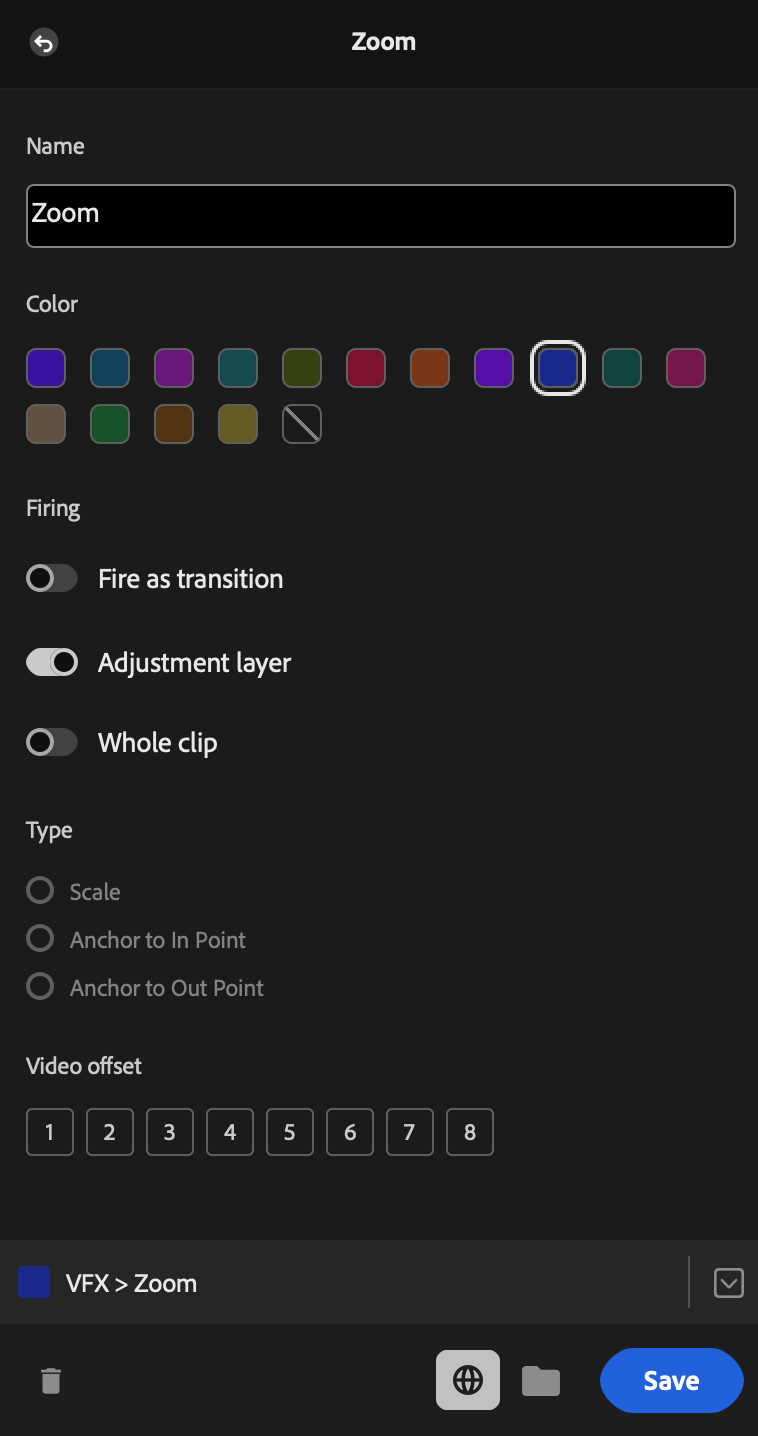
These fields are the same for every Bullet you save.
1 Name
The name of the Bullet.
2 Color
The color of the Bullet. It is also the color of the adjustment layer when fired.
3 Video offset
The video track the Bullet fires from. See Track offset.
4 Folder
The folder where the Bullet will be placed. It can also fire your Bullets at random. See more in Folders.
5 Scope
- Global: the Bullet is available in every project.
- Project: it exists only in the project that is open now.
Content
Basically, Content saves anything that you select on your timeline. Learn more in Content bullets.
1 Audio offset
The audio track the Bullet fires from. It works like the Video offset, for the audio items of the Bullet.
Preset
Basically, Preset saves the effects, the properties and the keyframes of the clip that you select. Learn more in Effect bullets.
1 Firing
How the Bullet will be fired. With every switch off, it goes directly on the clip.
- Adjustment layer puts it on an adjustment layer above the clip.
- Whole clip makes the adjustment layer cover the whole clip. Without it, the adjustment layer goes from the playhead to the end of the clip.
- Fire as transition puts it across the nearest cut.
2 Type
Where the keyframes land on the clip that receives the Bullet:
- Scale stretches them with the duration of the clip.
- Anchor to In Point puts them at the start of the clip.
- Anchor to Out Point puts them at the end of the clip.
3 Save
The list of every effect and property of the selected clip. Mark the ones you want inside the Bullet. Motion and Opacity start unmarked.
When you mark Motion, the Firing switches are disabled, because the Motion of a clip can only go on the clip itself and never on an adjustment layer. If you want that animation on an adjustment layer, use Move Motion to Transform first and save the Transform instead.
See Effect bullets to learn more about these options.
Edit a Bullet
To edit a Bullet, hover it in the library and click . On the Edit screen you can change most of the options you chose when saving, such as the name, the color, the folder, the offsets, the scope and the way it fires. Besides that, you can:
- 1, Edit in Premiere: it appears only on global content bullets, and it opens the content of the Bullet in a timeline so you can change it by hand. The button next to it loads the latest version after you finish.
- 2, Delete: deletes the Bullet from your library. What you already fired on a timeline is not touched.
Edit in Premiere
You can also edit your global content bullets: inside the editor of each Bullet (the that appears when you hover it) there is the Edit in Premiere option, which opens the saved content of the Bullet in a timeline for manual editing.
Step by step:
- Hover the Bullet in the library and click .
- Click Edit in Premiere. Premiere opens the project of that Bullet, with its sequence ready on the timeline.
- Change whatever you want: swap a text, adjust an animation, replace a sound.
- Close that project and go back to your own.
After the edit, just close the project that was opened and, on the next fire, the Bullet will carry all your changes. What you already inserted on the timeline is never changed, which preserves your edits.
Import your own presets
If you already have presets in Premiere, you do not need to save them again one by one. Import the preset pack and they become effect bullets.
Sniper lets you import your Premiere presets into it, automatically. Click on the fixed bar and point to the .prfpset file. Sniper reads the pack, recreates its folder structure inside the library, and shows a table where you decide, preset by preset, what comes in, what is a transition and what goes to an adjustment layer.
Sniper does this for you automatically and gives you the best option, but you have total freedom to change it according to what is best for your workflow.
Step by step
Click on the fixed bar. The Import screen opens.
In Preset file, click Choose… and select the
.prfpsetfile.Name is the name of the pack. It becomes the name of the folder that will hold the presets.
Choose a Color for the whole pack.
Select Presets lists every preset of the pack, one per line. Each line has three boxes:
- The box before the name decides if the preset is imported. Unmark the ones you do not want.
- Is Transition: mark it when the preset is a transition, so it fires on the cut between two clips.
- AL: mark it when you want the preset to fire on an adjustment layer, and not directly on the clip.
Whenever possible, Sniper already marks these boxes with the best option it found for each preset. Change only what you need.
The Video offset only matters for the presets where you marked the AL box: it is the video track where their adjustment layers will be placed when you fire them.
On the strip at the bottom, keep Create new folder for pack or choose an existing folder.
Click Import.
What cannot be imported, like presets with masks or Premiere transitions (because of a limitation of Adobe's APIs, unfortunately), appears in a list, with the reason, before anything is written.
Once the presets are inside Sniper, they become effect bullets and gain all the powerful features of this tool.