
Install & setup
Requirements
Sniper works on Mac and Windows and requires Adobe Premiere Pro 26.2 or newer, including the Beta. Keep your Premiere updated to get the most out of Sniper.
Install the plugin
Option A: aescripts + aeplugins manager
The easiest way to install and license is by using the aescripts + aeplugins manager.
To install a trial you can select Add Trial from the Account menu.
Option B: ZXP/UXP Installer
Alternatively, install it with the ZXP/UXP Installer: open the installer and drag sniper_1.2.13.ccx, included in this download, onto its window.
If a warning appears ("No application compatible…" or "not verified by Adobe"), click Install anyway.
Option C: Creative Cloud Desktop
Double-click the .ccx file and follow Adobe's steps to install.
Open the panel
Restart Premiere Pro, then open the panel from Window › UXP Plugins › Sniper and dock it wherever you like. It adapts perfectly to your screen.
First-run setup
The first time you open the panel, Sniper shows the Quick setup screen. The plugin stays locked until you finish it. It asks two things.
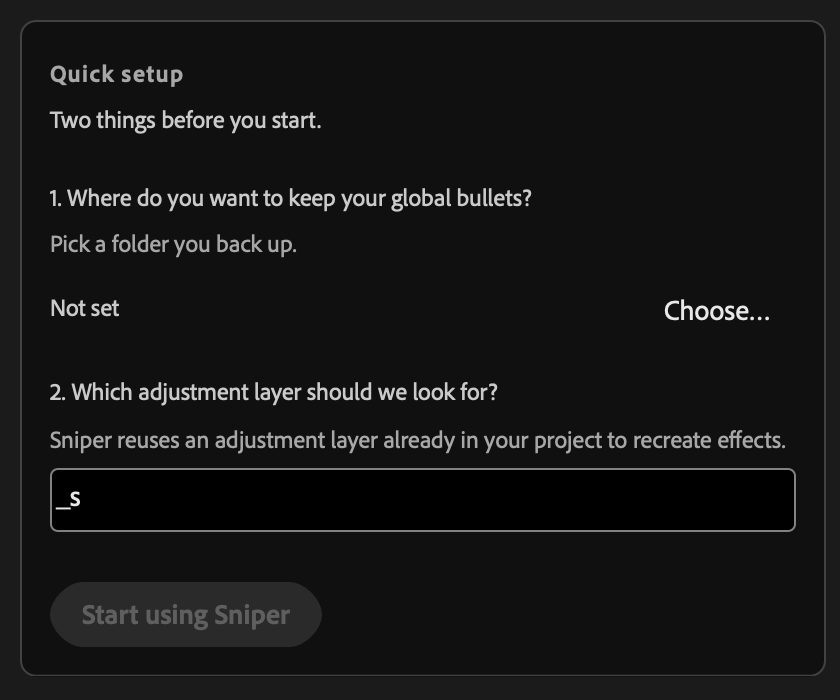
1. Where do you want to keep your global bullets?
Sniper needs a folder on your computer to store your global Bullets and your settings.
Just click Choose… and pick a folder on your system. We recommend a secure location, so you do not lose your data. Also keep a backup of it, as you should with all your important files. 😉
2. Which adjustment layer should we look for?
Effect bullets can fire automatically on an adjustment layer. Adobe Premiere does not allow Sniper to create it, only to reuse one that is already in your project. So in every project you need to create it (see below).
To stay fast, Sniper always looks for one specific adjustment layer. This saves the plugin from searching your entire project each time you fire a Bullet.
So, in the setup:
Type the name you want in the field. If you leave it empty, the name will be Sniper by default. Note that you will create the adjustment layer with this name in every project, so we recommend something simple, like
_s.In Premiere's Project panel, click New Item at the bottom of the panel (image 1), or right-click inside the panel and choose New Item (image 2), then pick Adjustment Layer.
Image 1: the New Item button at the bottom of the Project panel Image 2: right-click, New Item, Adjustment Layer Then rename that layer to the same name you chose in the Sniper setup. The two names must be identical.
That's all! You never need to put the layer on the timeline yourself. Sniper does it when a Bullet fires, or when you use one of the tools that need this adjustment layer.
Changing settings
You can change your settings at any time. Just open the panel's menu (the ≡ next to the Sniper tab) and click Options.
Then you can choose another work folder, change the name of your default adjustment layer, and manage your license key.
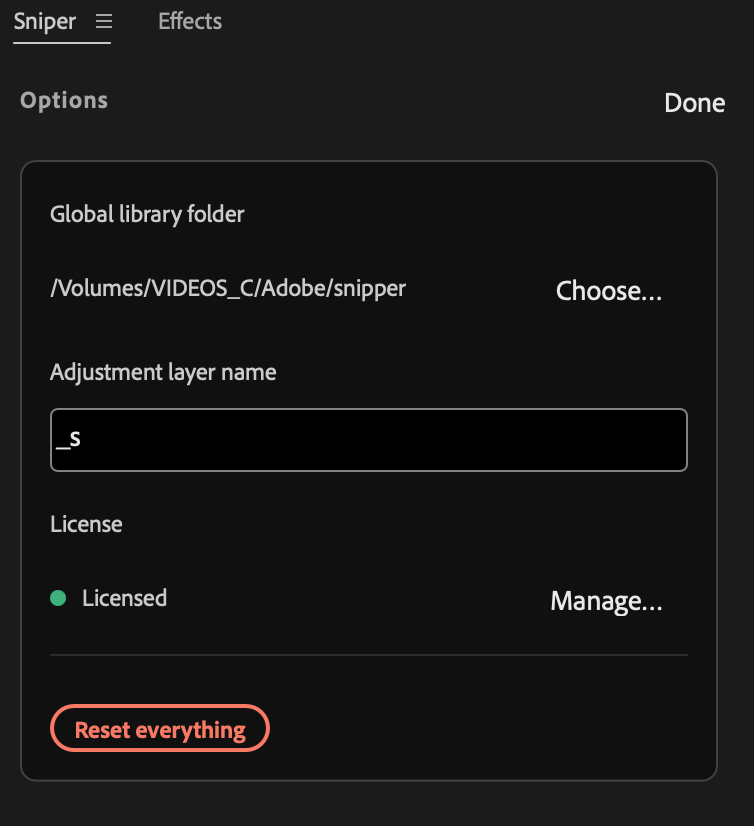
Global library folder
The folder from step 1.
Adjustment layer name
The name from step 2.
License
Shows the license state. Manage… activates, deactivates or moves your license.
Reset everything
Erases every preset and option. It asks twice.
Uninstall
- Quit Premiere Pro first.
- Remove the plugin from Creative Cloud Desktop ▸ Manage plugins ▸ Sniper ▸ Uninstall, or from the aescripts ZXP/UXP Installer.
Your Global library folder is untouched. After reinstalling, re-open Options ▸ Global library ▸ Choose… and pick the folder again to restore your bullets.