
Ease presets
If you do not want to control each aspect of your curve in detail, the Ease comes with the ideal amount of movement presets that will help you raise the level of your animations, without leaving you confused among 1000 options.
Besides that, you can save your own presets.
In total Sniper offers 4 predefined categories of presets, each of them named by the speed with which the animations enter or leave the screen and by the intensity of the movement. This makes it simple for editors who do not have an animation background to understand intuitively what to use in each case.
The categories are:
- Basics: Linear and the classic eases, in several intensities of entrance and of exit.
- Overshoot: variations with overshoot at the start, at the end or on both ends, plus five intensities of spring, from Soft to Wild.
- Elastic: at the start and at the end, in two intensities, with two, three or four oscillations.
- Bounce: at the start and at the end, with one, two or three bounces, plus a heavy version and a light one.
- Presets: the curves that you saved yourself, in the same list as the factory ones.
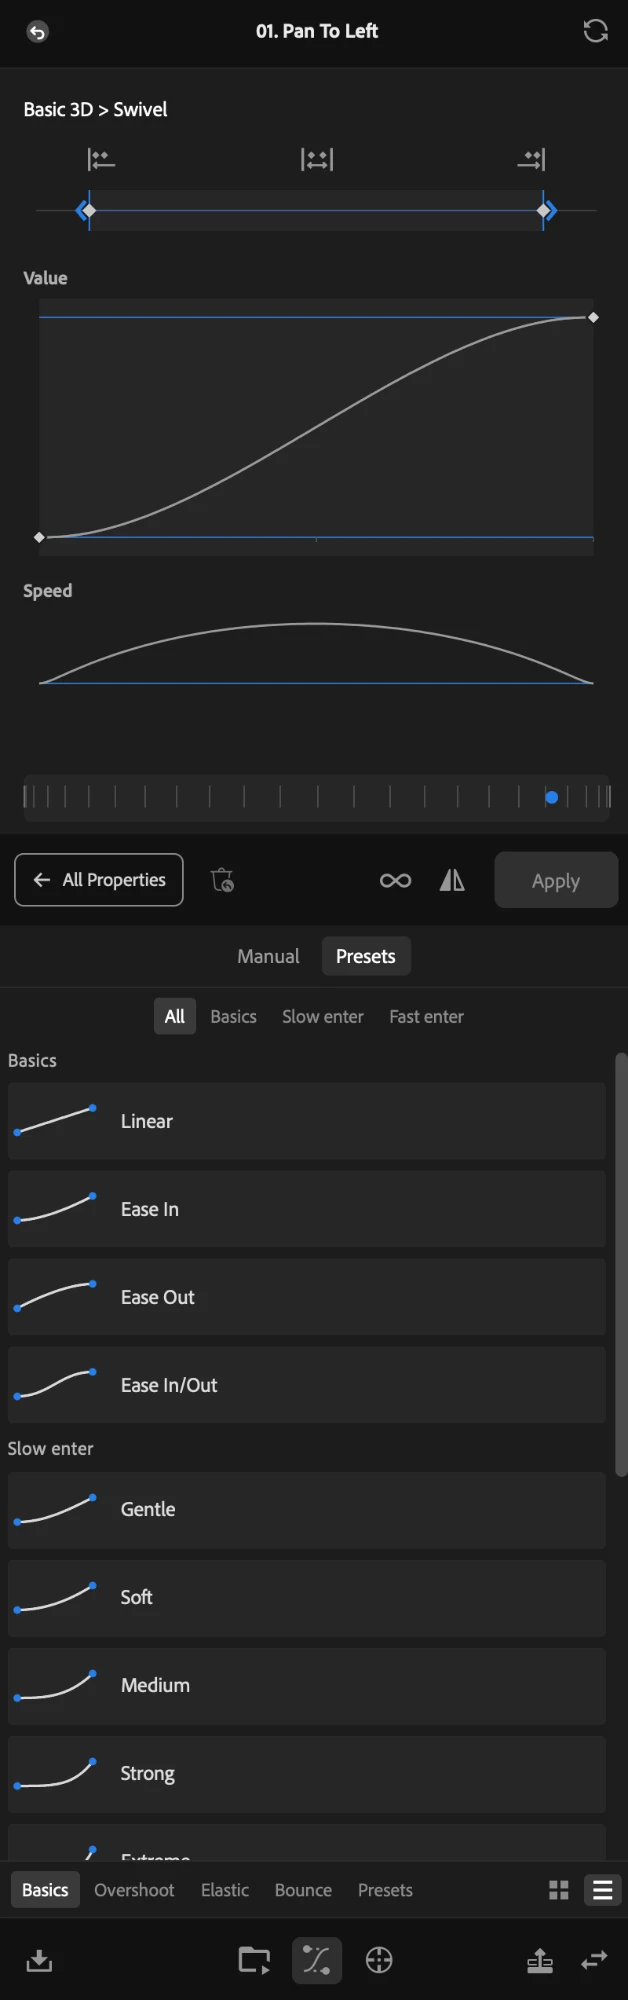
The whole animation or a stretch
If no keyframe is selected, the model is applied on the whole animation: the first and the last value stay and the keyframes in the middle go out. If you select a stretch (two keyframes or more), the models of Basics act only on that stretch and keep all the keyframes in place. However, the models of Overshoot, Elastic and Bounce, and also the curves that you saved, are always applied on the whole movement.
Ease every stretch and keep all the keyframes
If your animation has several keyframes and you want a preset of Basics on all of them, without losing any keyframe, select them all before choosing the preset:
- In the Value graph, click the first keyframe.
- Hold Shift and click the last keyframe. All the keyframes of the animation are selected.
- In the Presets tab, click a preset of Basics, for example Ease In/Out.
Each stretch between two keyframes gets the ease of the preset, and every keyframe stays where it was. Without the selection, the same preset would be applied on the whole animation and the keyframes in the middle would go out.
Save your own curve
To save your own curve, just go to the Presets tab and click + Save this curve, then type the name and press Enter, and the curve that is on the screen becomes a model available in any project. Only the curves saved by you can be deleted.