
The library
The library is the most powerful tool in Sniper. It lets you save and reuse almost anything from your timeline, from a single SFX to a complex edit with several layers, or even all the properties and keyframes of a clip. Each saved item is called, inside Sniper, a Bullet.
Types of Bullet
There are three types of Bullet that you can save in your library.
Effect bullets
When you select a clip, you can save all of its properties, effects or keyframes as a preset, similar to what Premiere already allows today, but with a much higher level of control and new ways of using your presets, which completely change the experience and the productivity.
Content bullets
Basically, you can save whatever you want from your timeline as a content bullet: video clips, audio, graphics, on one track or on several. Just select the items and save. When you click the Bullet in the library, they are inserted back on the timeline, from the playhead.
The great advantage of the content bullet is that it does not deform your timeline to save. You do not need to nest anything to preserve animations or transitions: just select what you want, save and use.
SFX bullets
When you select only an audio on the timeline and save it as a content bullet, Sniper understands by itself that it is an SFX. It opens an extra "play" option in the library, which lets you listen to your SFX before firing them on the timeline.
What each icon on a Bullet means
Every Bullet in the library carries small icons on its right side. They help you identify three things at a glance: the type of Bullet (effect, content or SFX), its scope (global, which is available in every project, or local, which exists only in the current project) and the way it is fired (directly on the clip or on an adjustment layer).
| Meaning | |
|---|---|
| Effect bullet | |
| Content bullet | |
| SFX bullet | |
| Global: available in every project | |
| Project: available in this project only | |
| AL | Fires on an adjustment layer |
| Clip | Fires on the selected clip |
| V3 A2 | Fires from that video or audio track |
The ? button in the bottom right corner of the panel shows this same key.
Header icons and filters
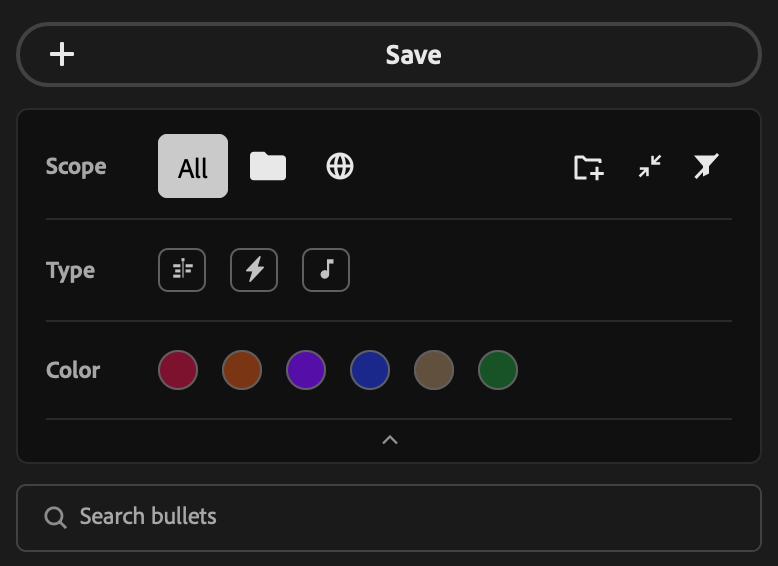
The header is the area above your list of Bullets. From top to bottom, it has the Save button, a card with the filters and three icons, and the search field.
The + Save button saves what is selected on your timeline as a Bullet. You can read how it works in Save and edit a Bullet.
On the first line of the card, on the right side, there are three icons:
- New folder creates a folder to organize your Bullets.
- Collapse all folders closes all the folders at once. When they are all closed, the same button opens them all again.
- Clear filters turns off every filter that is on, so you see the whole library again.
The rest of the card holds the filters, and you can combine them:
Scope: All shows everything, shows only the Bullets of the current project, and shows only the global ones.
Type: shows the content bullets, the effect bullets and the SFX.
Color: Colors are a smart way of organizing your library. Think of them as categories, or labels. For example, you can always make your SFX green. Then, even if they are spread across several folders, you just click the color and see all the matching items at once. Besides that, when a Bullet is inserted on the timeline it carries its color with it and paints the adjustment layer with the same color, which lets you understand your edits visually.
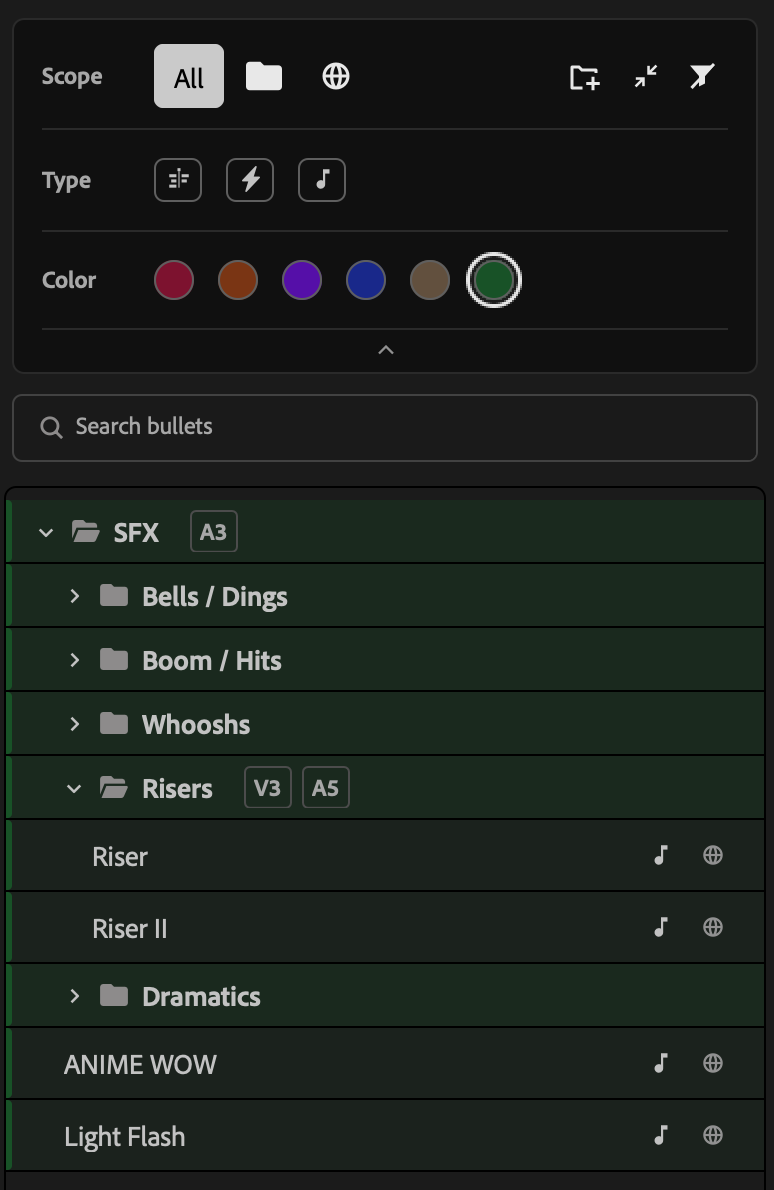
With the green color selected, the list shows only the green Bullets and folders. In this example, green is the color of the SFX.
The small arrow at the bottom of the card hides the filters when you need more room for the list, and another click brings them back. Under the card, the Search bullets field looks for what you type in the names of the Bullets and of the folders.
The filters and the search stay saved, so you come back to the project and find the library the way you left it.
Folders
Folders in Sniper are not just decoration: they have a real function. When you put a set of Bullets in a folder, they inherit its settings of color and of audio and video offset, which lets you group your resources in a simple way, for example:
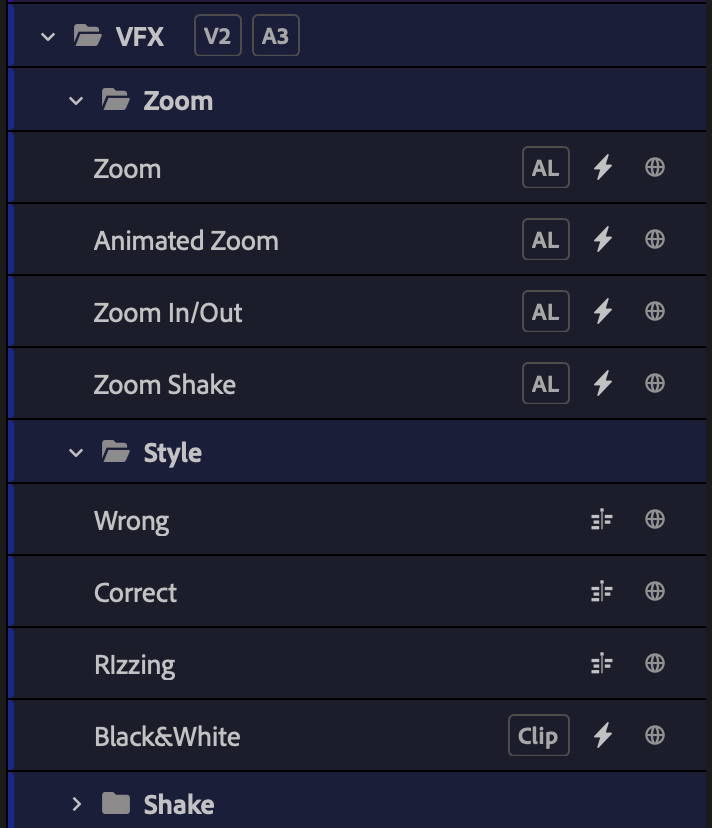
You can create as many levels as you want, but remember that each level inherits the settings of the level above. You can override these options: the bullets always inherit the settings of the level closest to them.
To create a folder, click at the top of the library. To edit one, hover it and click , the same way you edit a Bullet.
To put a Bullet inside a folder, just drag it to the folder. You can also choose the folder on the strip at the bottom of the Save screen, or open the editor of an existing Bullet with and change it there.
When you delete a folder with , Sniper asks for a confirmation. By default only the folder goes away, and the Bullets that were inside it are kept. If you mark Delete in cascade, every folder and every Bullet inside it is deleted too.
Editing a Bullet
Hover a Bullet and click to open its editor. Name, color, folder, scope and the firing options can all be changed at any time. See Edit a Bullet.