
The ruler
The ruler is a very powerful tool. It shows how the keyframes of the property are distributed on the clip. Besides that, it lets you move these keyframes to any position of the clip, or even outside of it, which creates animations that were almost impossible with Premiere before.
Another feature of the ruler is that you can easily increase the duration of your animation (without touching the duration of the clip) by dragging one of the edges of the keyframes on the ruler. This makes Sniper redistribute the keyframes proportionally to the new duration, a feature that until now only existed in After Effects.
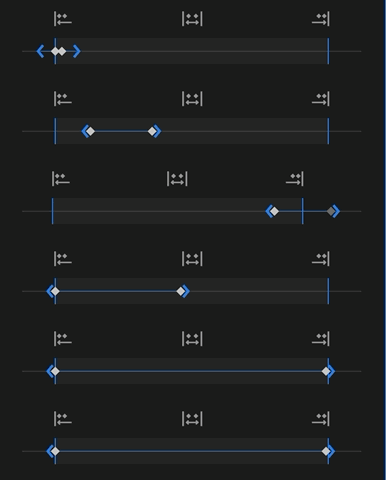
The same ruler, with the same buttons and gestures, is on each card of the property list, so you can move an animation without opening it.
The three buttons
To make editing easier, the ruler has 3 buttons that help with the distribution of the keyframes:
- Put all the keyframes at the start of the clip.
- Put them all at the end of the clip.
- Or distribute the keyframes over the exact duration of the clip.
When the animation is too short
Some curves need room to move. A bounce or a strong ease squeezed into 3 frames has nowhere to go. When that happens, Sniper warns you before it writes anything.
- 1, the amber min mark on the ruler: where the end of the animation has to reach. It moves live while you change the sliders.
- 2, the Apply key turns amber, and its tooltip says Needs more frames.
Click Apply and Sniper tells you how many frames the animation has and how many it needs:
- Cancel goes back without writing anything, so you can drag the end of the animation to the mark yourself.
- Apply and adjust stretches the animation up to the mark and then applies it.
- Apply anyway writes the curve on the frames you have, even if it gets cut.